
OK, so I haven’t entered anything in my bullet journal since March. What I have been doing is treating it more like a daily journal or an every other day or so journal. I am trying to document my Mom’s hospital and rehab stay as much as possible despite not being a diary keeper. So much for not being a daily entry keeper, I just ran out of pages in my bullet journal the other day. 😦
Ironically, I was at Walmart picking up a few things for my Mom last week. I passed by a clearance section. They had these planners for .50¢ and I spy this one with a pretty black and white cover (My current planner theme this year!). I figured I would use the cover as a stencil but yesterday, I thought about retrofitting it to be my new bullet journal.


The cover is a thick plastic and the white backing appears to only be attached around the edges. I will attempt to use this as a stencil once I am done with the journal.
The layout isn’t all that terrible. Although, I didn’t even flip though it when I purchased it. Every month has a calendar page and then a weekly spread. In the back of the book, there are contact, password and note sections. Which is great because I dislike when they are in the front.
The weekly spread, I am going to use that as my daily journal logging and tracker. I am not sure why they number the lines each day and start with 7-12 then 1 -8. If anyone knows why please fill me in. For the time being, I will Washi tape out the first set of numbers and just write over the second set.
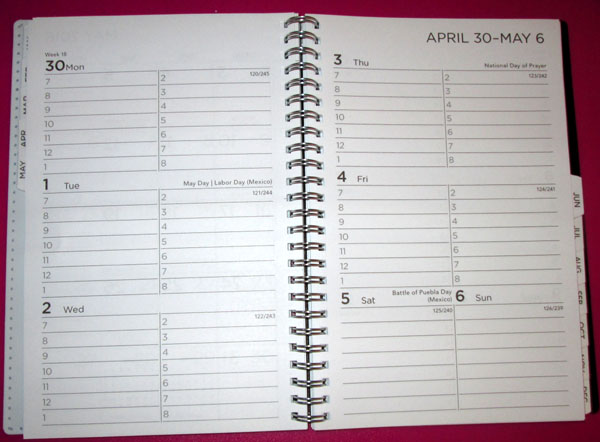
The calendar two page spread has a place to write a To Do list off one the side. So that is taken care off, now, I needed to retrofit my other reoccurring monthly entries.
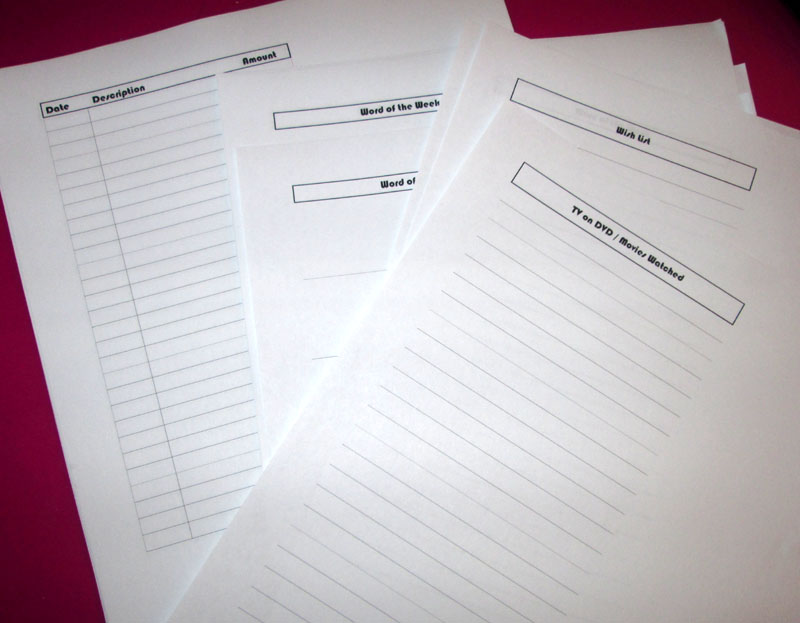
I did spreadsheet layouts and glued them in to January – March sections. Since, I have an ink jet printer, I did the printing at Staples. The pages cost $2.50 so the entire book (not including the Washi tape) was $3.00. Finally, the spaces are large enough for me to write in! This was a major issue I had with my grid bullet journal.
Here’s the layout:
- First page is a pocket that I created and messed up and then fixed. Yikes! That will be an entirely different post. This page isn’t completed decorated yet either.
- Next page has this year and next years, calendars so I kept that as is.
- Next page is just a splash page I created.
- January = Expenses. I did 10 pages for my Expense section. That should be good enough for the entire year.
- February = Challenges. I did 6 pages for Word of the Week and have 4 blank pages to fill up with doodles or whatever I want. I am hoping to get back into my lettering.
- March = Lists. I did my standard Movie, Book and Wish list but will expand the section for purchases and Christmas List for the family. This section is still not completed as used up my glue stick and matte medium didn’t do a great job for this section.
- April – I left in place as I will probably back fill some of it.
How to do it? I have a cheap paper cutter that can handle letter size paper. So I just measured out one page and went from there cutting two sheets at a time. I would recommend doing a better job that myself with the left hand margin. I had to cut it but should have fixed it before printing out the copies.
For gluing, I used a glue stick and that worked wonderfully. I ran out of the glue stick and tried using matte medium. That came out horrible but I will deal with it.
I used some gesso to cover up the darker writing on the page. I was afraid gessoing the entire page would create a wrinkled mess. So I only did the bolded text with two thin layers of gesso. You can see the list page has gesso pages since I need to get a glue stick to finish that section.
There is ghosting but for me it isn’t too bad that it is bothersome. I was thinking of using cardstock but that would have really bulked up the book. It could have worked if I was removing a lot of pages but I wanted to keep my sections in place.
I added Washi tape to the edges to give it a more polished look. Believe it or not, the Washi tape took the longest aside from that pocket disaster.
Here’s the pages in order (Skipping the dupes of course):
So going forward, maintaining each month should be a easy and less time consuming. I only have to put some Washi tape over the journaling section and then I am done. I did enjoy creating new themes each month in my Bullet Journal but I am not really artistic. I just need a place to track my Mom’s numerous doctor’s appointments, numbers and notes. This will allow me to do so quite easily without all the monthly fuss.
I will blog next month about how this journal worked or didn’t work. I am kind of happy to just have the layouts done and still maintaining the sections that are important to me. Finally a chance to use my Washi tape.
Enjoy!
Printables:
